
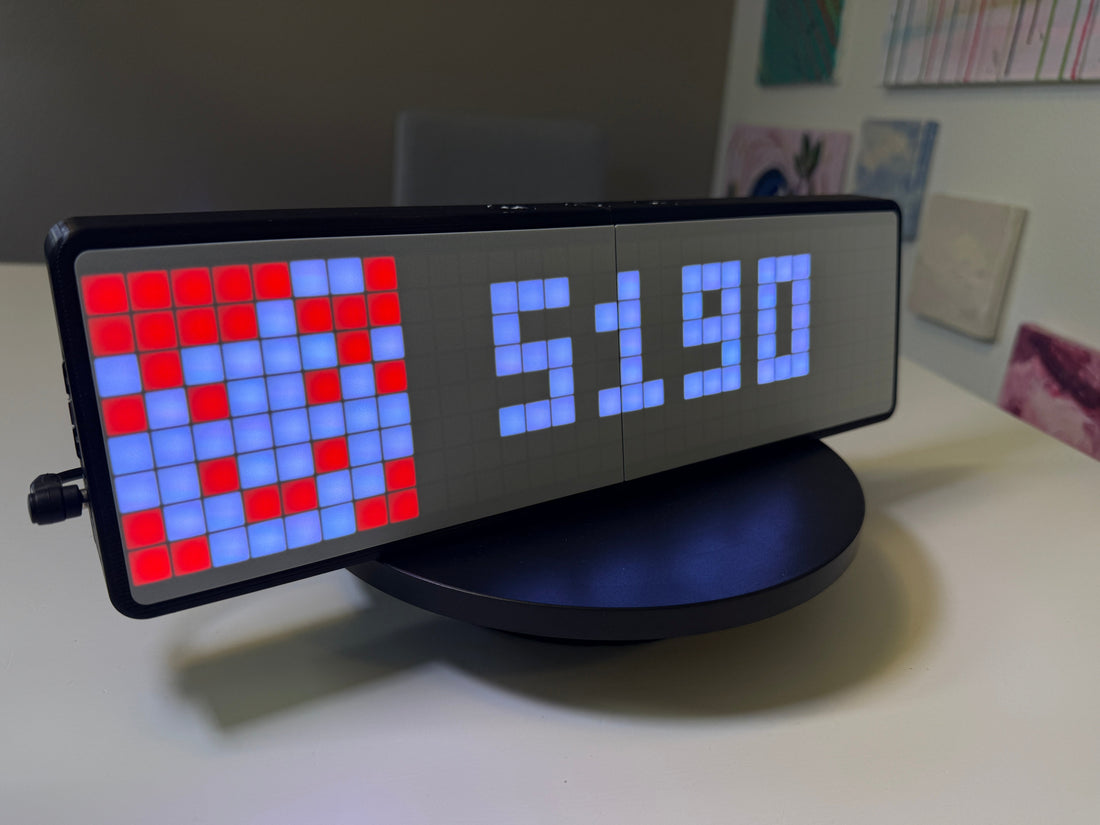
DIY Social Media Follower Display (Awtrix)
Welcome!
We are revisiting our first project, “DIY Youtube Subscribe” with a newer, better version!
If you're looking for a way to display all your social media followers information in one devices this project is for you! The project uses Awtrix software (open-source) and basically, it is a blank display, and you can display ANYTHING you want there (not only social media information).
What will you need for this project? (includes affiliate links).
Electronics:
8*32 WS2812B Matrix Display - Link
Temperature & Humidity Sensor - Link
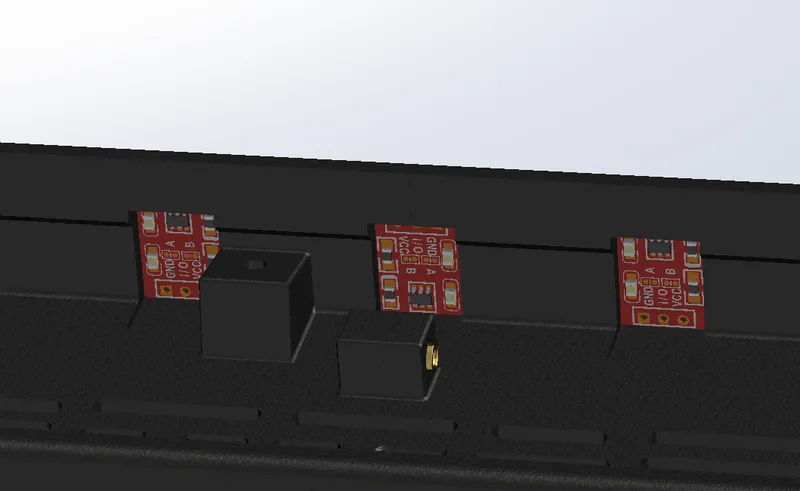
TTP223 Capacitive Touch Switch - Link
On/Off Switch - Link
Power Supply - Link
Need to choose from 2 options:
PCB - Fully assembled PCB that will make the project much easier (and will also help and support us to make more projects like that) - Link
OR
ESP32 version - Link - you will have to wire everything yourself and hot glue the power connector and the ESP to the body of the display.
Hardware:
M3 Thread Inserts (x23) - Link
M3X8 Screws (x11) - Link
M3X5 Screws (x16) - Link
Software:
Awtrix3, open-source project - link
We will USE n8n to send information to the display you can run it on your HomeAssistant Server, Regular Server or on your Desktop using Docker Desktop.
Links:
Printed Parts:
1x Body left
1x Body Right
1x Diffuser Left
1x Diffuser Right
1x Diffuser Connector
4x LED Support
Assembly Instructions:
Step-by-Step Video (Body + Software): the easy way
Written instructions if you don't like moving pictures:
Body build Instructions:
(DONT forget to follow the wire diagrams added in the files project)
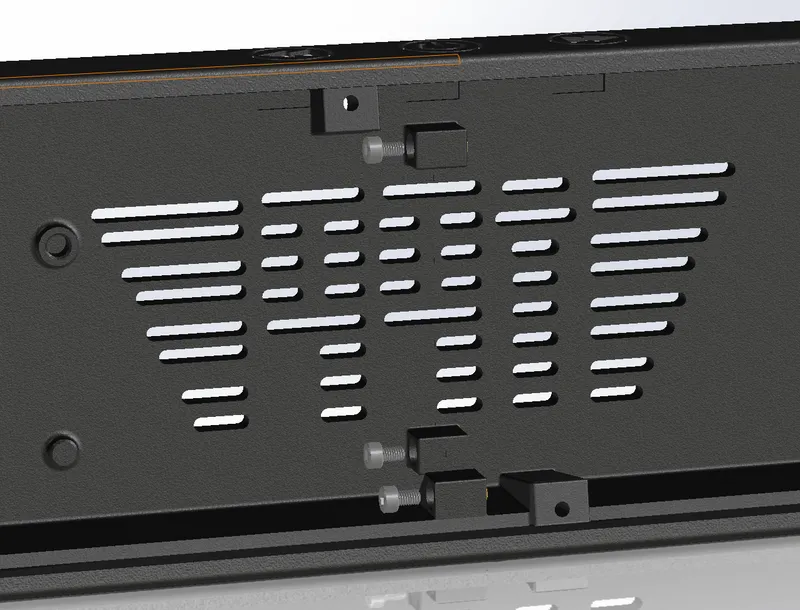
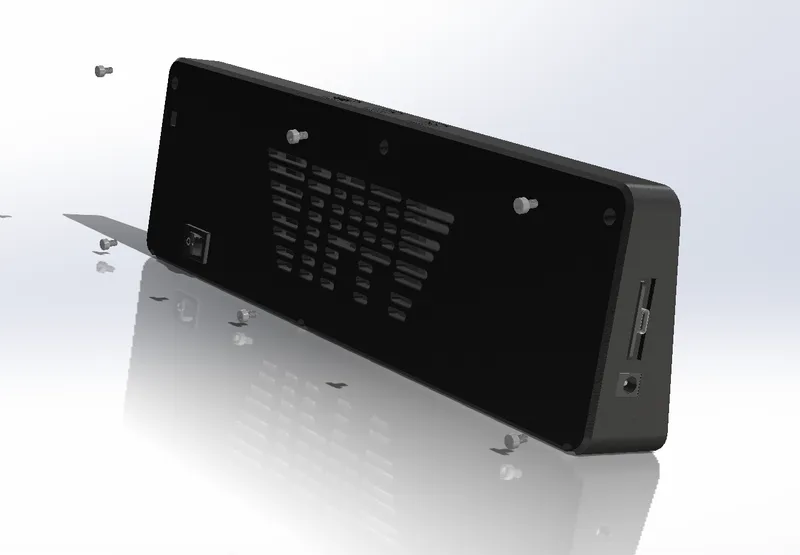
- press 3 thread inserts into the right body part, as you see in the picture below.
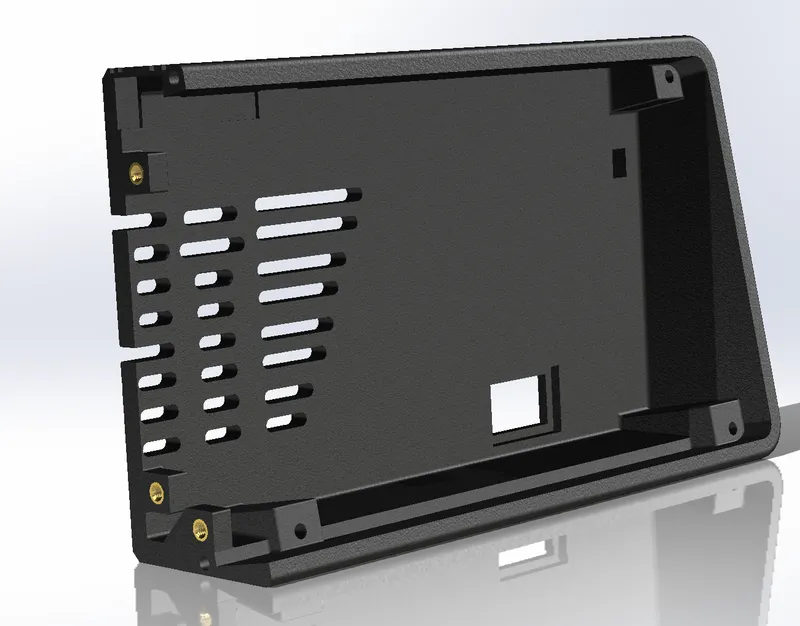
2. Connect the two halves of the body with 3 M3x8 screws
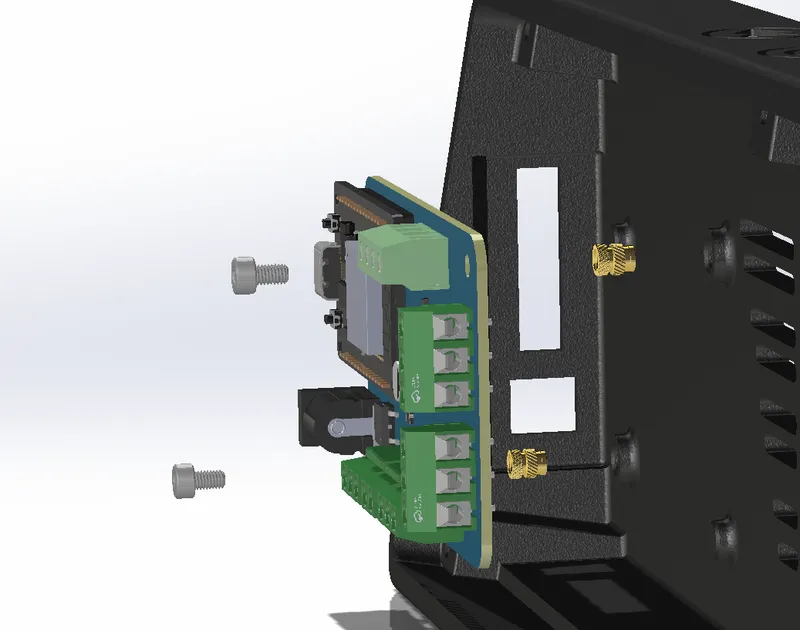
3. Press 2 heat inserts into the left body part, and screw in the PCB with 2 M3x5 screws
4. Hot glue the temperature sensor (don't forget to wire it!) to the right body part ( make sure the temp sensor is showing through the hole).
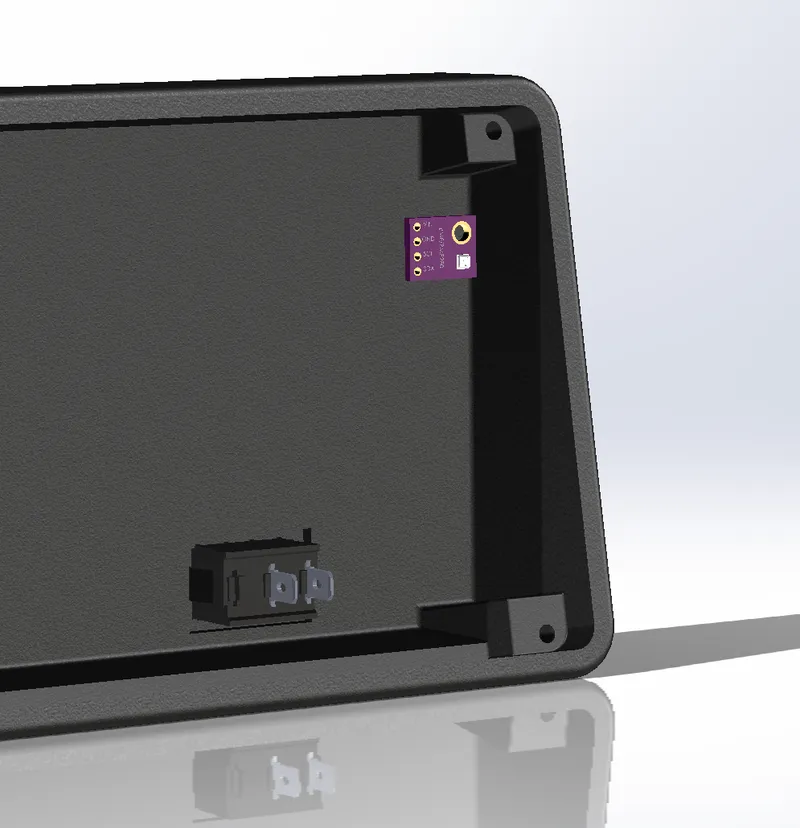
5. Wire and hot glue the 3 touch sensor into the top of the body assembly.
6. Press the 16 heat inserts into the diffuser 2 parts.
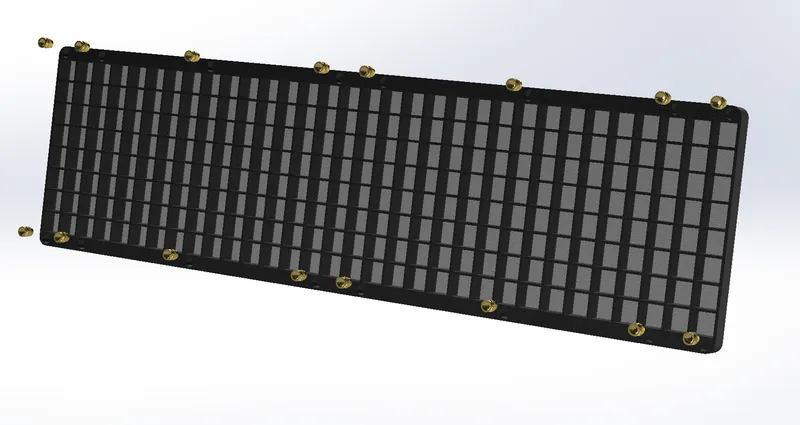
7. inserts the LED matrix and close everything with the 4 LED Support parts using M3x5 Screws. Connect the two halves of the diffusers with the Diffuser Connector and 2 M3x8 screws.
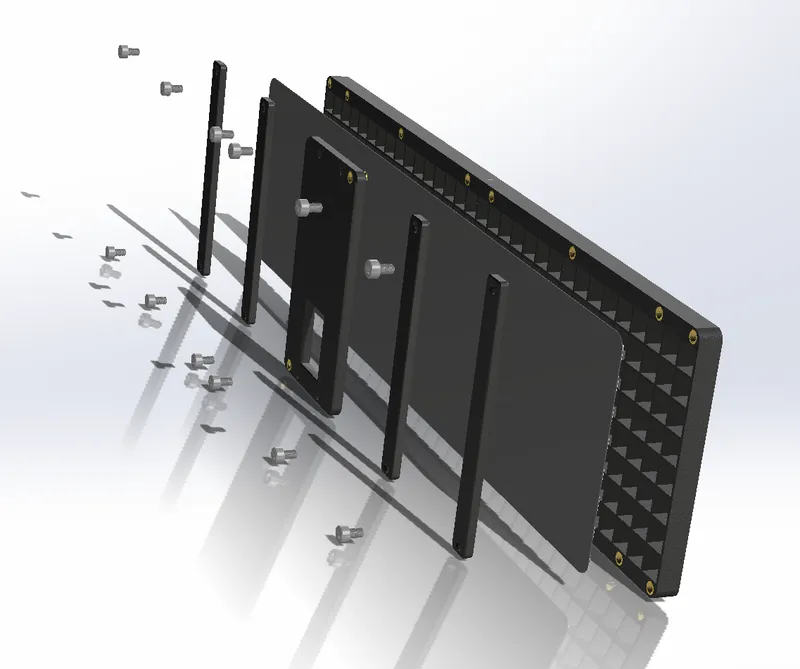
8. Finish the assembly with 6 M3x8 Screws and connect the body with the diffusers.
n8n instructions:
in the project here, you have .json flies (example YouTube.json), this files are the automation workflow that n8n will run to send information to the display. the code is already ready! all you have to do is just add your information.
DO THIS FOR ALL THE WORKFLOWS:
Start with:
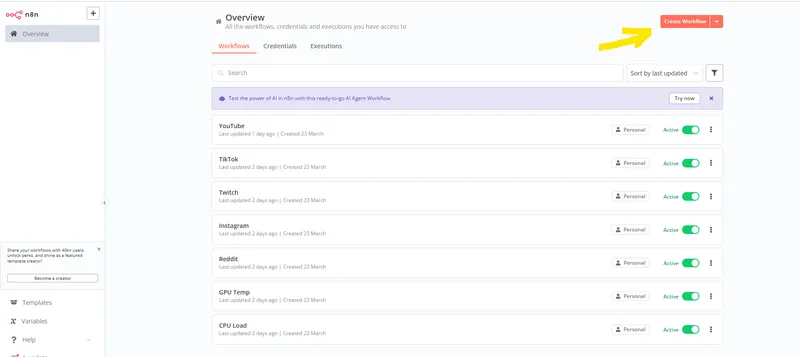
Open n8n: and press “Create Workflow”
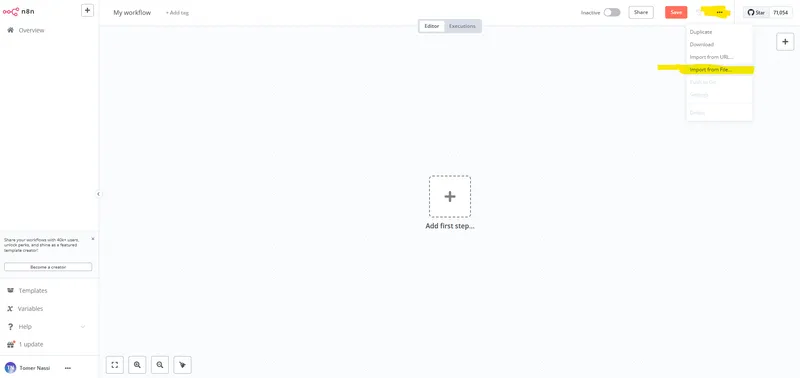
Press the 3 Dots on the top right, import from file, and import the JSON file you want.
Now follow the instructions under the correct json file (for example Tiktok)
COME BACK HERE after you finish with the json instructions and do this:
AFTER changing everything you need to change in the json (check the instructions below)
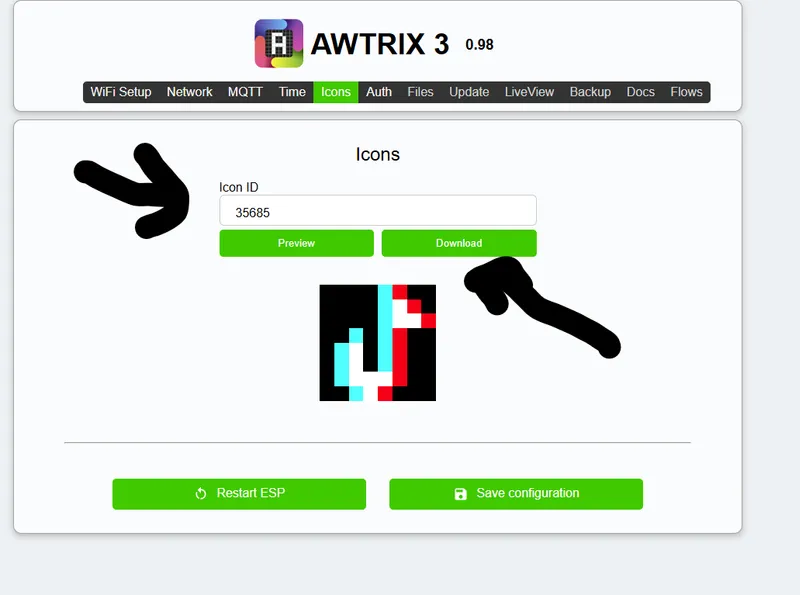
for every json, you will also need to download the icon to your display, go to the social media flow, go to send to clock, scroll down until you will see ICON and copy the numbers:
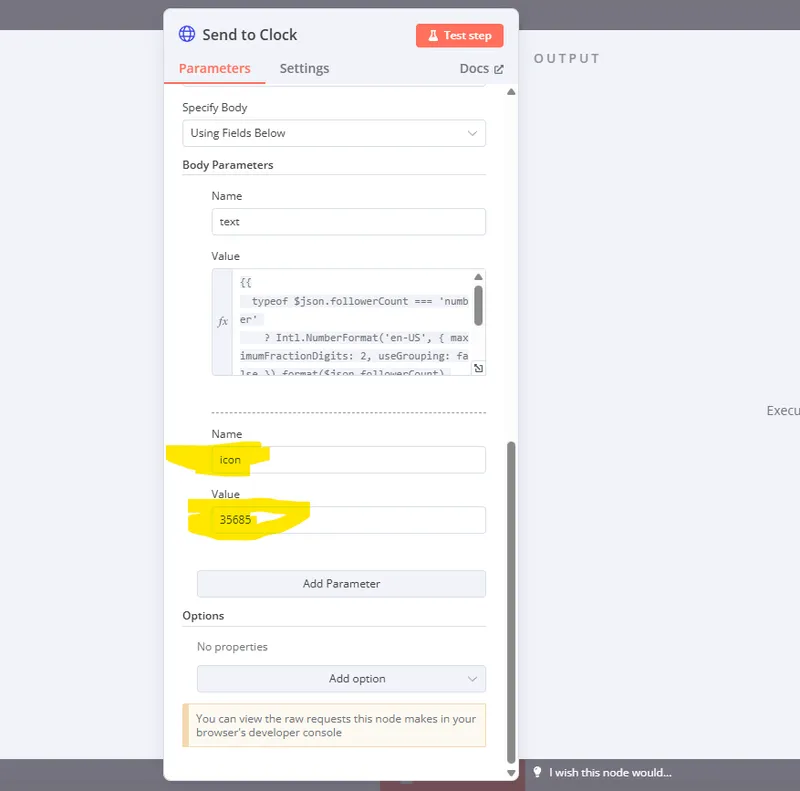
Go to your favorite browser, go to the display IP, go to icons, paste that number there and press download, that will load the icon to the display memory,
Tiktok:
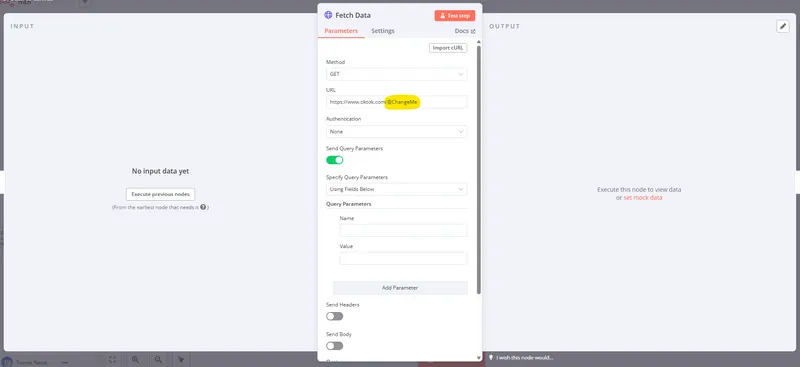
after loading the json, double click on fetch data, and add your username instead of “ChangeMe”
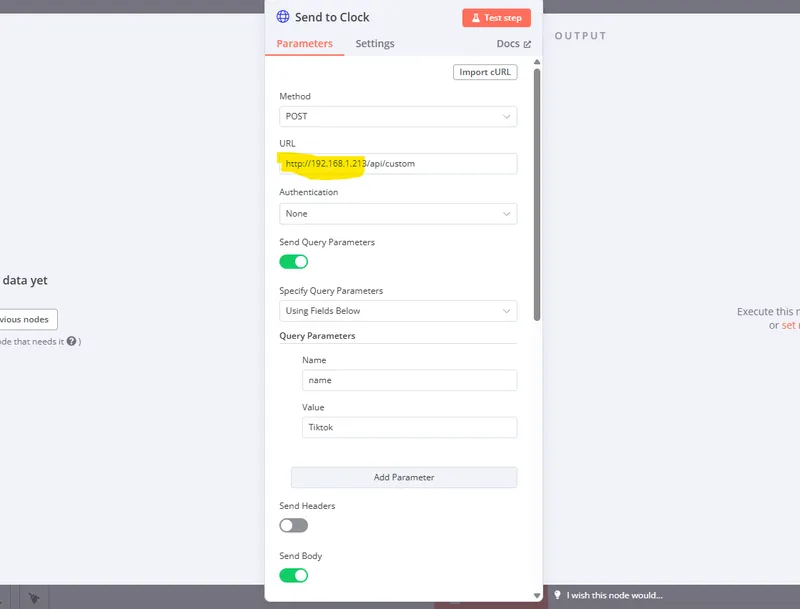
Under Send to Clock and Remove app, Change the IP to the IP of the Display:
Now go back and do the Icon download.
Youtube:
You will need to create a project in Youtube Developer, (full instructions in this video).
You will need your channel ID and your API Secret key.
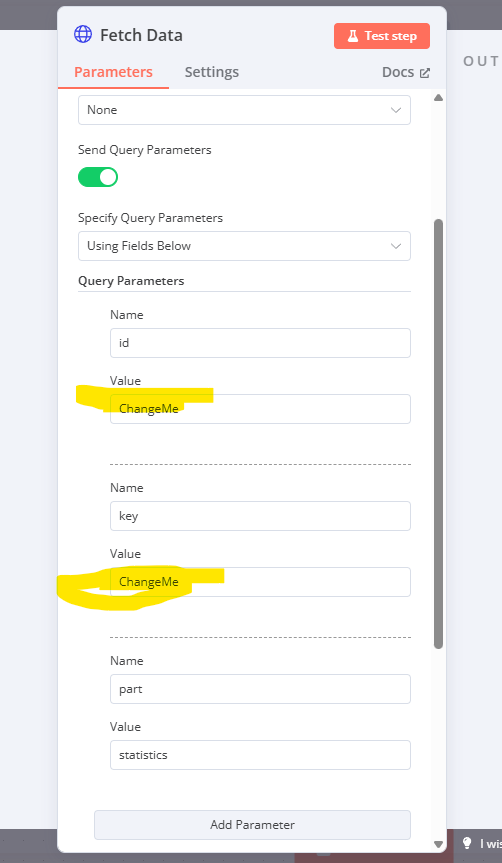
after loading the json, double click on fetch data, and add your ID and Secret KEY instead of “ChangeMe”
Under Send to Clock and Remove app, Change the IP to the IP of the Display:

Now go back and do the Icon download.
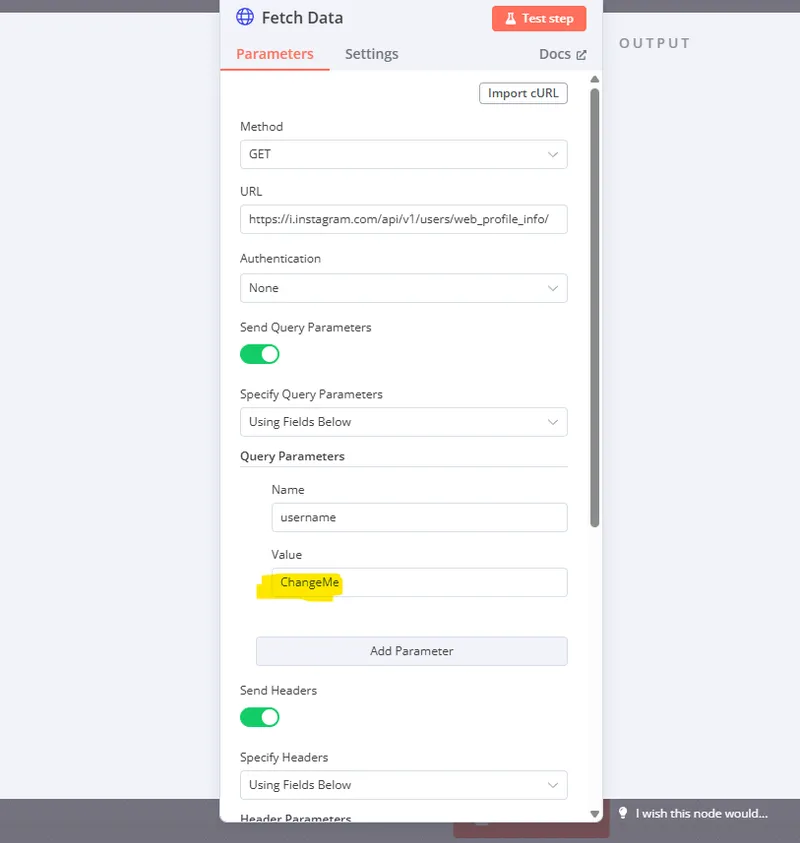
Instagram:
after loading the json, double click on fetch data, and add your Instagram name under username. (replace the ChangeMe).
Under Send to Clock and Remove app, Change the IP to the IP of the Display:

Now go back and do the Icon download.
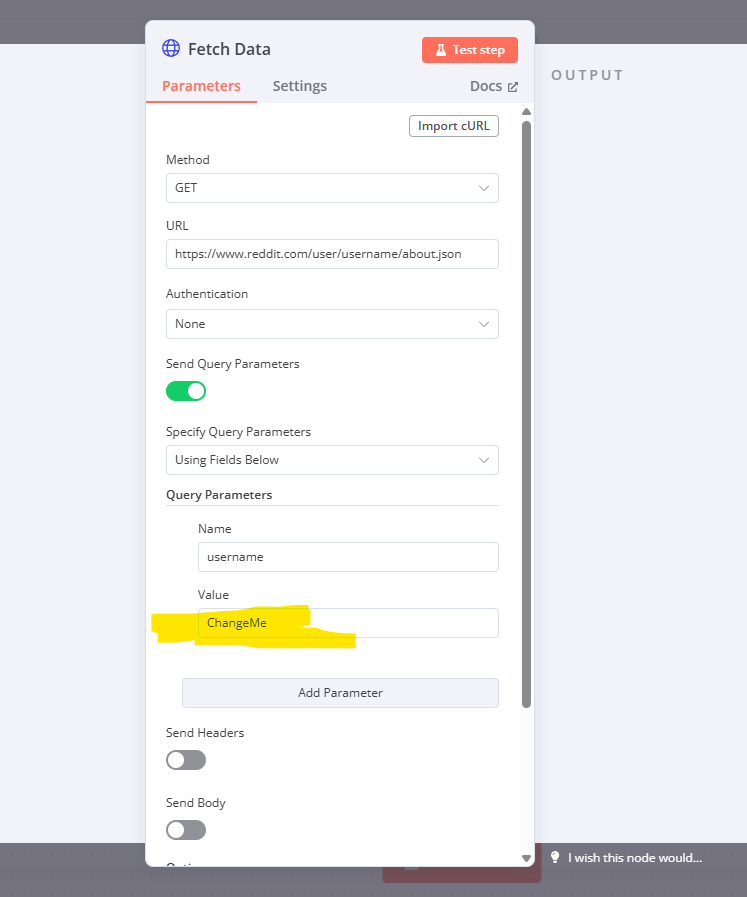
Reddit:
after loading the json, double click on fetch data, and add your Reddit name under username. (replace the ChangeMe).
Under Send to Clock and Remove app, Change the IP to the IP of the Display:

Now go back and do the Icon download.
Twitch:
- Go to Twitch Developer Console, Press on Register your Application.
- Name -
whatever you want. - OAuth Redirect URLs -
http://localhost:5678/rest/oauth2-credential/callback. - Category -
Other. - Go back to Dashboard and press on your
Mangeon your new app. - Copy
Your Client ID, PressNew Secret, And copy yourSecret Code. - Go to this Website, and get your
Twitch Broadcaster ID.
Now we have everything we need, go back to n8n and load the Twitch Json file.
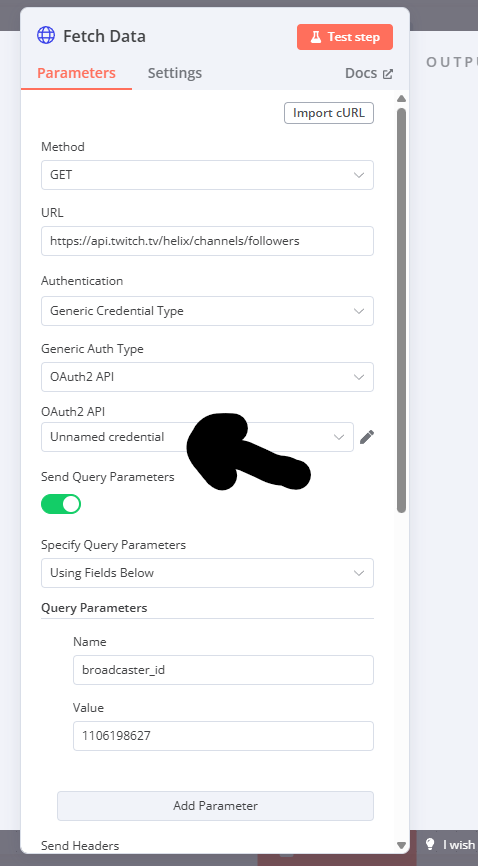
Press the Fetch Data, Under OAth2 API press Create New Credentials
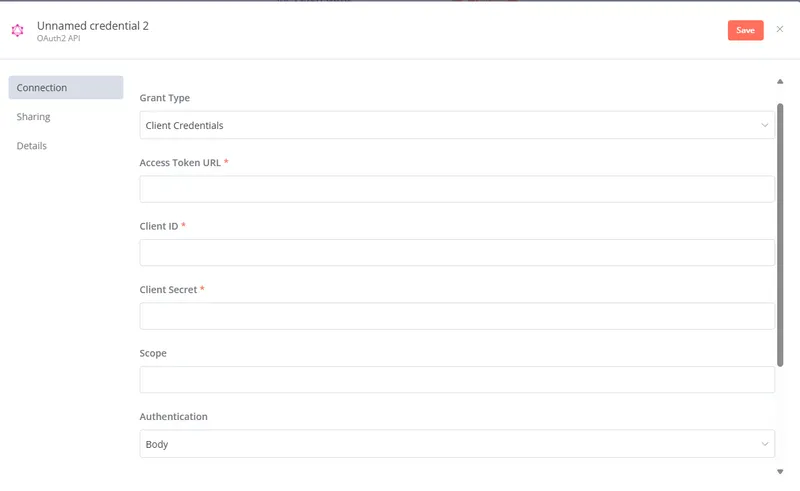
In the new window fill all the inforrmatin needed:
- under
Grant TypechooseClient Credentials. - under Access Token URL add
https://id.twitch.tv/oauth2/token. - add your
Client IDfrom the previous step. - add your
Client Secretfrom the previous step. - Under Scope add
moderator:read:followers. - under Authentication choose
body.
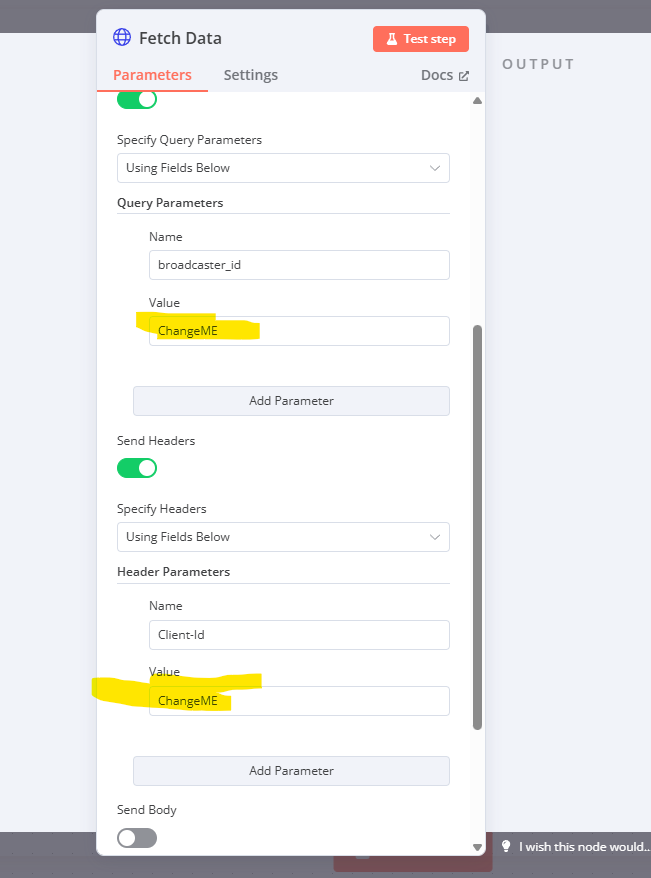
Go back to fetch data window, scroll down, under Broadcaster ID add the Broadcaster id we got from the previous step. (the website). And under Client ID add your Client ID again.
Now go back and do the Icon download.
Hope you enjoy this project! if you make one please share it with us :D